Sketch Challenge Time

Its another Wednesday Sketch Challenge over at my favorite spot for challenges...of course it's "The Outlawz" where all scrappers are welcomed and wanted.  Although my attempt at offering a challenge didn't go so well I will not be discouraged and I will be back with another challenge but until I do get takers I will continue to participate. The challenge this week was a sketch that had lots of possibilities.  In fact I made three cards before I decided on the one I thought represented the sketch the best. So I give to you the sketch we had to use and my card.

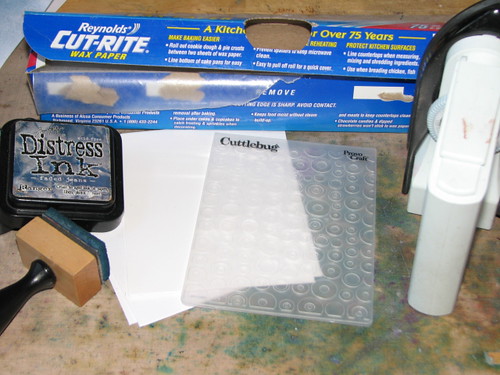
Card Supplies or Recipe is as follows:
CS: Bo Bunny Gabrielle
MS: Butterfly Punch
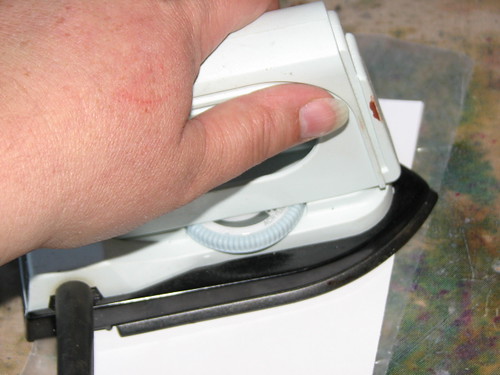
Ribbon: tan ribbon that I stained with distress ink
Sentiment: Dollar Bin at Joanne
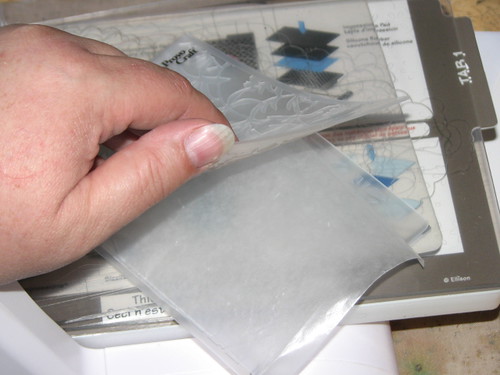
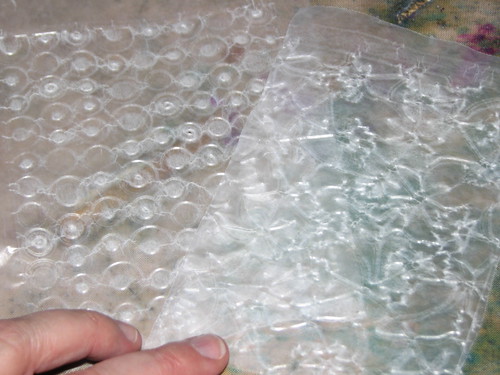
Spellbinders Nestiabilites

Lost Kitty

When you have a long weekend, you get to mop and vaccum floors, laundry, iron, grocery shop, wash the car and the list just continues until finally you pick a day and make it your scrappin day and when you do that you can get a lot accomplished. Thats what I did and below are the results.
Card Recipe or Supplies:
CS: DCWV paper pack
MS: Monarch butterfly border punch
Image: Sarah Kay Collection
Colored with copics (didn't do so well on this one due to sneezing and allergies)

Sexy Sax Player

With all the cardmaking I've been doing I almost forgot about the photos I still had in envelopes that needed to be scrapped so I went back to that task and managed to get one created. Take a look below and let me know what you think.
Just in case you're interested here is the card recipe.
CS: SteamPunk paper pack
Gears die from Tim Holtz
Prima Pearls
Distressed inks from Tim Holtz
MS Border Punch
Iron Gate from Cricut Cartridge

Holiday Season

Would you believe that it is time to start preparing for Christmas. We have less than 75 days before the children will be writing letters to St Nick and the hearts of people will become more open to others and cards will be exchanged wishing good cheers and lots of joys and blessing to one another. So I thought I would start creating my designs. I think I will do 10 designs and that way I will have my cards ready to go when its time and over at YouTube University they have a tutorial on how to create a box to hold these cards. Well I've gotten one completely and 9 more to go. So here is a peek at my first design for 2011.
Well there you have it. I've been really busy this weekend with my scrappin and soon it will be over. In the meantime keep creating and inspiring others to be creative.

As always thanks for dropping by and while you're here don't forget to leave a comment and tell me how I'm doing.  If you're not a follower, go ahead and become a follower of my blog.  New projects are loaded weekly so check back often and look for events, challenges and giveaways on a monthly basis.

Just A Few More

Over at Scraps of Color they are having this activity to "Use your Stash; Get rid of the Trash" and in my effort to stay engaged and join in I started using my scraps or trash to see if I could get anything out of them and I got lucky with the ones shown below. Created from scraps I had left over and a little bit of imagination.

The Color of Fall
The Color of Fall was created using scraps from the new paper company "Authentique", basic white cs that was dry embossed and an added image completes the card. The image was colored with Copics.


Flower Garden Trelis
The technique used on the Flower Garden Trelis was provided courtesy of Beate Johns from Our Daily Bread.  This lady is awesome with all her cards and she has videos on youtube that covers all these techniques we would never think to do. I'm glad she is doing this because I surely don't have time.
Hope for the Survivors
With this card I was going for soft pinks but my inks didn't quite match up and for the first time I didn't use a test sheet before inking.  It was a rough day and I was tired. You know the routine when you go to bed around 3am and get back up at 8am to start the day of chores. Makes for a long day, and a few mistakes. I didn't like the way it turned out but it had a reason therefore I felt it worthy of being posted.

October Challenges

Well, I made it back after a week of work and the issues of life. You know they say bad luck comes in three well I think it forgot to stop at three with me. Talk about bad luck! Anyway I won't bore you with the details, instead I will move on with some fun things I've been doing. First of all I have been looking for challenges to enter and I am finding quite a bit.  To bad the challenge I had opened didn't appeal to anyone and I had lots of candy to give away, but maybe next time it'll be better.  In the meantime I can entertain myself with challenges. The one I'm currently finishing up is one hosted by The OutLawz as there Saturday Paper Ala Mode Challenge "Tag You're It" and this is such fun because its open to anything you want to do as long as you have a tag involved somewhere, so here is my entry.
This card features two pockets on the front that can hold two sentiment tags as I have done or one tag and one gift card, or small candy treats, tea bags, flower seeds and the list goes on and on. Real simple to make with one double-sided 8 1/2 by 11 sheet of cardstock.  I used a MS border punch and the cricut cartridge Ornamental Iron to create my embellishments.


Challenge at The Outlawz

Hey everyone, there's a challenge going on over at "The Outlawz" and I just finished my project and I think it is ready for submission. I love working with sketches because you can get so many different interpretations and I will make 2-3 cards or layouts and then decide which one I like best. By the way check out my left sidebar where you will see that one of my layouts was featured at The Outlawz site. Talk about excited, I was featured...had to show it to my grand-daughters and even boasted just a little to them. Anyway on to my project:

I call this card Disco Boogie and here is the recipe for what I did:

Layout Design: The Outlawz Wednesday Sketch Challenge
Paper: Recollections Paper Stack
Image: Digi Stamp By Kenny K
Media: Copic Markers
MS: Border Bunch
Ribbon: Stampin Up
Bo Bunny: Brads
Prima: Rose Buds
Card Size: 6x6


For the inside I used the same Martha Stewart Border punch to carry the theme. Keeping it clean and simple I added a space for a personal message.

Thanks for stopping by and happy crafting. Leave your comments below, take part in my challenge and then head on over to The Outlawz and join the challenge fun there as well.

Challenge Excitement

Well my challenge opened yesterday and I am a bit disappointed that I have no takers but I will be patient until the end. In the meantime I created a second card using the tutorial and wanted to share it with you, just to give you an idea of how it looks as a Christmas card.
This is the front of my card. I used DCWV paper and ribbon from Joann's Craft Store.


Here is the inside. The tags I started decorating but didn't quite finish, and I replaced the actual stitching with faux stitching.


Well I hope this will encourage you to take a chance and join the challenge.  As always thanks for dropping by and please know that I really enjoy your comments.

First Ever Challenge For MemasCrafts


The rules for this challenge are as follows:
1:  You must be a follower of Memascrafts
2.  No link-back entries are allowed
4. Create and upload your project to your blog and then use the inlink tool to link back to your project; if you do not have a blog you can upload your projects to photobucket and then link
5.  Complete the Double-Pocket Tutorial. Get the tutorial by clicking on the Double-Pocket Tutorial tab above and printing the instructions.
6.  Since it is the start of the holiday season, I am thinking the theme of your project should have something to do with the holiday season. (winter, fall, Christmas, Thanksgiving, or Halloween) 
Independent judges will view the cards and select the one they think followed the rules and instructions the best.

The winner will win some nice goodies that include items from brand names such as such as Tim Holtz, Making Memories, Prima, DCWV, Recollections and more. This blog candy is small but based on interest the next one will be even bigger!  Tell your friends because I need a minimum of 10 participants or the challenge will be cancelled and reopened at a later time.  Thank you and good luck.


Blog Candy
 Finally got a photo of what I've got to give away:


Joyce's Double-Pocket Card

Below is another example of the Double-Pocket card from the talented Scrapbook Stampinista.

Completed Card with Message Insert Tab
 Here is the completed card and the message insert tab shown together.


Opened Card with Message Insert
 Here you can see the card opened with the message insert included. Look at the detail she put into this card.

Boss's Day

For everyone out there that has a boss, just in case you aren't aware, today is Boss's Day which of course is being honored tomorrowed. If you're lucky like me you have a boss that is easy to work for and has earned your respect.  Yep, believe or not I actually like my boss, so I've made a card for her to celebrate. There are three of us that is part of her actual staff therefore we call ourselves the 3 stooges (all in jest of course) so that is the reason you will see 3 tags inside the card. So without more gab here's the card.
 
This is the front of the card and while it appears to be plum, in reality it is more of a purple and lavendar. Guess the flash on my camera wasn't turned on..silly me.

And below this is the inside of the card. I think the verse I chose will bring about a smile which is what I'm aiming for and if that doesn't work then hopefully taking her out to lunch will do the trick.

Cardstock: Paper Studio  Martha Stewart: Border Punch  Sizzix Embossing Folders  Bo Bunny Rub-Ons

Buzzing By

I created this little card so I could participate in a sketch challenge over at "The Outlawz".  I chose Black and Yellow because lately those colors just seem to be everywhere.  Anyway here's the card.

 Recipe for this layout:
Cardstock: 1 chocolate 12x12 by paper studio and 1 12x12 Bo Bunny
Die Cut: Bo Bunny Timeless Collection
Tim Holtz: Distress Inks Walnut Stain and Frayed Burlap
Tim Holtz: Ideaology Adage Tickets
Daisy Doodles Flowers
Tim Holtz metal charms

This card has a brown card base with a layer from Bo Bunny that has been distressed and stained, then misted and finger-curled. The sentiment was printed and then cut using a Spellbinders die I think label 18. Butterfly punch from Martha Stewart and Prima flowers and bling was added to finished it off.

First Halloween Card


This is the front of my card. The stamp is this adorable little Witch Tilda With Pumpkins. She is such a cutie. My inspiration came from Angie Hunt whom I must give credit for this design. I saw her brown paper bag creation and could not believe my eyes.  Since I didn't know how to use a brown paper bag I thought create a card, so here she is.  I'm not sure why the colors look a little off but they are more vibrant than they appear. Her legs look a little orange but they are tan and you can't see the stickles that I added to the ruffles on her dress.

This is to show you that the bat is actually a pull tab for you to grab and pull out the hidden message.

Now you can see the full tag with the little crooked fence designed to add that scary or spooky feel.

And finally here is the inside of my card with the Halloween poem included.  Yeah its on the internet without an author.

Recipe for my card:
Coredinations CS and KaiserCraft 13th Hour Paper pk
Ribbon: $Bin atJoannes. Stamp: Witch Tilda with Pumpkins from 7KidsCollegeFund. Copics: Pumpkins YR14,YR12,YR15 Dress/Hat: V17,V15,BV17 Shoes/Ruffles: T1,T2,T3, C5,C7 Other: E00,E11,E13,E47,E49 (look for the tag and the inside)
Halloween poem printed and cut out using Spellbinders. Lamp Post cut with Cricut Heritage cartridge. Pumpkin border by EK Success and little vampire stamp from Hero Arts.  Fence cut using Tim Holtz die.


Wax Paper Embossing

Embossed Wax Paper Resist
a.k.a. - Faux Embossing Resist- Tutorial By Ink Stains

Wax Paper Technique #2 - Faux Embossing Resist 006

Supplies:

Wax Paper
Glossy Cardstock or Plain Cardstock
Iron
Embossing Folder
Die Cut Machine or Rolling Pin
Ink
Ink Blending Tool

Instructions:

1. Place a sheet of wax paper in the embossing folder.

Wax Paper Technique #2 - Faux Embossing Resist 004

2. Run the folder through your die-cut machine OR if you don't have a die-cut machine use a rolling pin to smoosh the paper in the folder.

Your paper will look something like this....

Wax Paper Technique #2 - Faux Embossing Resist 007

3. Sandwich your embossed wax paper between two sheets of cardstock. They can both be glossy cardstock, one glossy & one plain or both plain cardstock ~ totally up to you. For my examples I am using one glossy and on plain to show you how they each look.

Wax Paper Technique #2 - Faux Embossing Resist 008

4. Iron your paper sandwich ~ this will only take a few seconds for the wax image to transfer over to the papers.

Wax Paper Technique #2 - Faux Embossing Resist 009

5. Add ink! This can be any dye ink you love...for me it's Distress Inks ;)

NOTE: If you look closely at the photo you can see that the example on the left (glossy cs) this is the positive image or the image with the bumps. The example on the right (plain cs) is the negative side of the wax paper or the side with the indents.

LEFT = Glossy Cardstock
RIGHT = Plain Cardstock

Wax Paper Technique #2 - Faux Embossing Resist 011

Closer Look....
Glossy Cardstock

Wax Paper Technique #2 - Faux Embossing Resist 016

Plain Cardstock

Wax Paper Technique #2 - Faux Embossing Resist 014

And a couple more examples....

Wax Paper Technique #2 - Faux Embossing Resist 012

Wax Paper Technique #2 - Faux Embossing Resist 001

The best part is the embossed wax paper can be used multiple times! I used one piece of wax paper to create all of these. You may be able to get another set but I didn't give it a try.

Wax Paper Technique #2 - Faux Embossing Resist 002

So how cool is that?!?!?
Pretty awesome effects for such an easy technique huh?
If I have time tomorrow I'm going to make a few cards using this technique...
I'm not sure how much time I will have as the Ladies Night Out Shopping Extravaganza is tomorrow night!
If not tomorrow then I'll have them sometime this weekend for you
Related Posts Plugin for WordPress, Blogger...