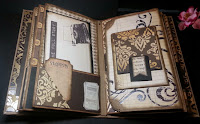
We followed a tutorial on YouTube posted by Gina of "My Scrapper Sisters." The end result is I had fun working this project with my crafting BFF (Joyce) and I am 98% finished, so I am going to share a few photos with you.
BEWARE!!!! THIS POST IS INFESTED WITH PHOTOS!!!
Above is a view of the front of my "Vertical Paper Bag Mini Album"
Papers: Kraft Cardstock and Recollections
Documented Memories Patterned Paper.
The little white tabs sticking out at the top are inserts that can support a 4x6 photo on one side and a journal or another photo on the opposite side.
The back cover with my signature stamp
My closure was made with duct tape a key ring and a swivel clasp.
This allows for me to add more embellishments and the closure will expand to accommodate the extras.
On the spine I added a face plate to support the closure band and from the ribbon I hung a few charms I found at a yard sale.
This page will open further to show more pockets where you can add a photo or whatever.
This is the inside of the front cover. The right side has two pockets, but I removed the journal tags that were housed in them.
The right side of this page has a pocket that holds a mini album that is kept closed by a magnet. The 3x3 mini album will hold 12 wallet size photos.
The following pages are all designed the same. Each page opens into 3 panels as shown in the images below and they each have room for a 4x6 photo or a pocket that hold a tag where you can journal or add your notes.
This is the inside of the back cover featuring a mini flip album that can hold 7-14 photos based on how you want to use it.
This is one of my favorite pages. I used it to hold quotes and tags that I cut from the paper collection and added my own pockets. On the left I added a side pocket but the tag is not shown in this photo (still needs to be matted)
The center page that has 3 letter tags "M-memories; L-love; C-cherish" and then there is room for a 4x6 photo.
The entire album has 6 pages and each page has four panels so there is a lot of space here. I created my mini with very little embellishments but I think it turned out nicely. Additionally, each page has a top loaded insert that will hold both photos and journal. That's 6 more panels, so with this album you have a total of 36 panels to play with...THAT'S A LOT OF SPACE!
I hope this post hasn't drained you because it was rather long, and that is why I didn't post all 36 pages. I think 12 photos was enough to give you an idea of what the album looks like when finished.
This is a really cool mini album and I will try another one with the paper bags going horizontal instead of vertical just to compare the two.
Well that is all for tonight but I shall return soon with perhaps a new card to share with everyone. Let me say before I end that the month is almost over and a new challenge is ready to begin with a brand new sponsor, so be sure and stop back by. We will also be announcing two new winners at the end of the month (once I get back from vacation) so check to see if you're a winner.
Thanks for stopping by
Hugs
Lesia
SNEAK PEEK FOR SEPTEMBER CHALLENGE: FLOWERS AND LACE


4 comments:
This is amazing Lesia - love your colours and that closure is ingenious! What a fabulous project!
Blessings
Maxine
Awesome creation, just awesome!
hugs
Glenda
very cute......
also leaving a comment to let you know that I donated to SOC, as requested.
Wow - this is so detailed and intricate! It holds an amazing number of photos.
Post a Comment