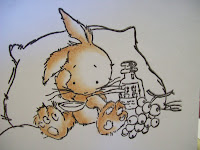
The tutorial below was not created by me. I found it quite by accident and after following it, thought it was worth sharing with everyone. If you prefer not to use Copics or ProMarkers but want the same effect then try this technique with plain old colored pencils. The results will amaze you. If you like this tutorial please visit Dorcas Designs and tell her thanks.
Colored Pencil Tutorial
Hi guys! This is a tutorial I made for my good friend, Annemaritta who is just learning the wonders of coloring. She has asked for some tips and I'm going to do my best to give her a few. :-)
If this tutorial helps anyone else I am very happy for it.
Above you see the supplies.
I use Prismacolor pencils most of the time. The fact is,I've tried several brands of colored pencils and Prismacolors have the softest ,creamiest lead. So if you can find them I would suggest you invest in them.
As you can see, I'm not using many colors here. And my pencils are not the sharpest.
I don't mean them to be.
Start off with very gentle, soft, circular strokes.
Find where your shadows would be (in this case I decided that the sun is coming from the right side, leaving the left of the bunny in shadows.This is where I am going to put down color.
See? You don't see any line marks because we went in light circular motions.
Now we'll continue with the rest of the body.
Pretty easy so far, right?
Now lets get out the goo gone or baby oil. I have put some sqares of felt in a container and poured a bit of goo gone on top to wet the squares. I am not going to saturate my blending stump. I am only going to dab my stump on the felt to moisten my stump.
Lets start with the ear.
From the outside in, work in circular motions to blend your pencil.
Looking nice. Now we'll continue with the rest of the body.
Now, it's looking pretty good but to make it pop we need to darken the shadows a little bit.
Use the same pencil.
Now blend again.
We're not done yet.
We haven't even touched another pencil yet! Lets get out the sepia pencil.
We want to darken the deepest shadows with the sepia pencil.
And you've got it. Blend. :-)
OKay, lets grab one more pencil. A pink pencil for the feetsies.Just do the same as you've been doing.
Blend.
And the finished wittle bunny wabbit.
I hope you had fun :-)


1 comment:
Thanks so much Lesia for this tutorial, I'm really only learning how to use pencils, I use mainly copics but they're getting so expensive to replace. My son purchase me Prismacoloring Pencils 72, and this tutorial was so easy explained, thanks so much
~ Denise ~
{Denise's Patch of Creativity}
Post a Comment