Hi There
I just thought I would announce that anyone who is a member of SOC please be on the look-out for a raffle challenge coming soon to SOC members only. This is to support the hosting and maintenance of the site and to ensure that it continues to grow as we have fun and share with each other.
Another reminder announcement is that Jackson's Digital Expressions offer challenges every single week and although the challenge has a title (sketch, color, altered art, etc.) that is only as an option for those that desire a little challenge. Otherwise all challenges are "Anything Goes" so get your creations entered every week for a chance at winning not only images from our talented Robert Jackson but also from our sponsors as well.
Last announcement, and this one is for Mema's Crafts. My grand-daughters decided that they wanted to decide what card should win in my challenges since they do assist in coming up with the ideas, so I have given it much thought and decided to allow them to join in by selecting a winner for June's challenge. This will not interfere with my normal challenge winners. In fact this means that there will be two winners for the month of June and if I get 50 entries there will be three winners.
I will get the challenge posted within the next 24 hours. I would have had it posted already but my four-legged friend had surgery and it took my whole day waiting for the results. We went in at 9:00 am for our appointment and was taken back for a consultation. At approximately 10:15am they took my baby back to be prepped for surgery and I was asked to leave and they would call me within 3-4 hours which meant I should have a call around 2:30 pm. I returned home and did a bit of office work so I wouldn't miss deadlines and get to far behind. Next thing I know it is 4:00pm and no call so of course I called. I was informed that there had been a few emergencies that put the surgeons behind on their schedule but things were back on track. Another 3 hours passes and now my whole body is running with anxiety and the negative thoughts have invaded my peaceful thinking, but I refused to call the hospital. Finally, I get a call and was given an update on my baby....also an update that my bill that started with a range of 400-600 dollars had changed to a range of 600-1200 dollars. My God were they doing heart surgery or something.
I swallowed the big lump in my throat, gulped down a few anti-depressants and ever so softly whispered out the nicest DAM DAM DAM that I could muster. A few more words followed those, and no I was not on the phone at the time. I did manage to say thank you and good-bye before the words from Satan escaped my lips.
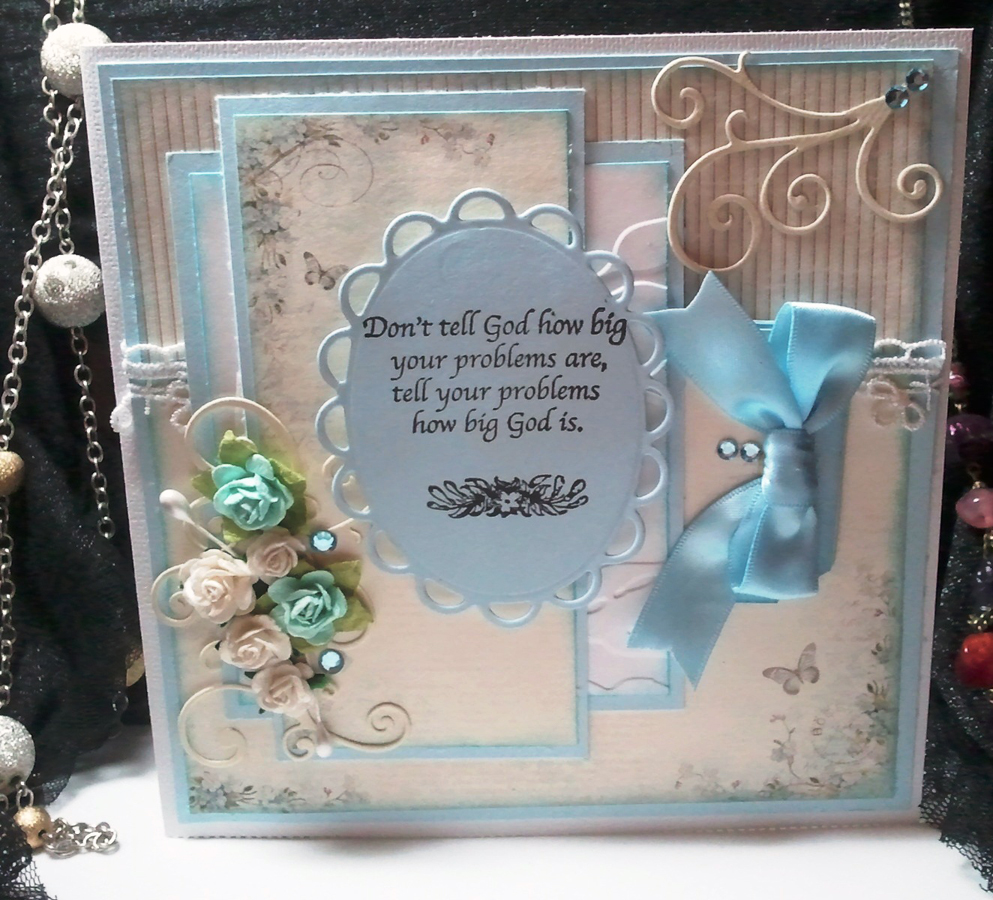
So what did I do, you ask....what else was there to do....I made a card. See below, and once again this was a first for me....a baby card....I don't do babies...I think this might have been my second baby card ever....kind of crude....but my world was topsy turvy.
A co-worker and his wife welcomed their first little one into the world so while my world was crazy I thought I would create a simple and quick card for them. I used two different paper packs for this card. One was Little Darlings from Graphic 45 and the other one was It's A Boy from Paper Studio. All the embellishments (excluding the buttons) were part of the paper pack.
So I will deliver this card to them on Monday, when I return to work. And now here is the inside which I actually like better than I do the outside.
The words I printed using my computer and the embossing folder I used was from Stampin-up. The little image is from the Graphic 45 paper pack and the letters are from the Paper Studio paper pack.
Well my lovelies thats all for now. Thanks for stopping by and as always "find beauty in all things and then go create your own."
Leave a comment and look for my next challenge coming soon when I announce our May Challenge Winners.
More Trials And Errors
Hi there fellow crafters, isn't it a wonderful world we live in filled with all types of papers from which we can create...well...I say this very loosely because let me tell you, I am discovering that I know very little about this paper world that I have joined. I am not complaining because not knowing is a challenge and learning opportunity. So as I've told you in the past I love looking for tutorials and sometimes I am successful, other times I have practice a bit and then there are times when I need to just accept defeat and move on. Well I've ran into a lady "Marianne S." who challenges me with everything she creates. The beauty of her talent is just so amazing and I want to be able to do that so very bad....dare I share my humble attempts with you all.
I believe you to be my friends and will not judge me to harshly, but take pride in the fact that I tried. And you know what else, there may be those out there just like me but a bit to shy to say they tried...or perhaps they want to try and just haven't found anything. Well I have quite a few so bare with me and if you get tired of looking, take a break and come back okay. Well let me get started...in fact I may have to come back and just repost.
The first card I am going to share, I thought was going to be for a challenge but by the time I got it at a state (had to make it 3 times) where I thought I could submit it the challenge had closed. Now mind you this was a month long challenge and I still missed it but I finished the card.
With this card I got to use for the first time my Pion Designs Paper...I just couldn't bring myself to cut the paper because it was so pretty, then I discovered that I could purchase it as 6x6 squares and I thought how wonderful. I purchased a few sheets and then waited for the right moment. The cardstock is Bashful Blue from Stampin Up and so is the ribbon. I used Wild Orchid flowers, Spellbinders Nestibilities for my sentiment and the flourishes are from Marianne Designs.
I did some staining around the edges but the white cardstock is from a Color Book paper pack I got at Wal-mart and I truly wish I had used my Stampin-up but live and learn. Sometimes Color Box just isn't the right weight for me. Anyway on to a peak at the inside of the card.
I didn't do very much to the inside. I used the rest of the Pion Design paper to add a mat and liner to both sides and then added a piece of lace ribbon across one side. I didn't add a space for a personal message because the left side is light enough to write on, or I might decide to write a bit of poetry on the left and in that case you could sign your words of wisdom to the right panel. This paper is really gorgeous but be careful because the colors are not bright or vibrant, instead they have a muted vintage color.
As I watched video after video on Youtube University I kept seeing these step cards: Right-step, Double-step, Step with a Twist and then Center-step. I said to myself, I said "self, why don't you give this one a try?" and self said "you know, I think I will...can't be that hard." Well my friends, I am not the cutting type of individual. My hands shake, my eyes will blur without notice, and even not blurred I can barely see the blade on the cutter. That's one of things that follow the I can't draw a straight line even with a ruler...serious, that is me. Just ask one of my grans that are always saying Mema, that's crooked or still not straight. Oh, sorry I digress. The only thing I can remember about the card is I used scrap paper, a Martha Stewart, Tim Holtz gears, prima flowers and a few Recollections pearls or bling. The Cros-chain housing my sentiment is from Stitchy Bear if you'd line to get it. Guess I might as well share the inside of the card with you.
When I got to the inside I was so frustrated with the folds that I wasn't really designing, I was just trying to get finished so I came up with this, which after looking at it I thought, hey not to bad...I think I like it. The border lace I used was part of a border sticker I had gotten ages ago and the sticky didn't stick anymore so instead of thrashing the whole thing I managed to salvage the ribbon lace that was connected to it. Nowadays, it seems I can't throw anything away. I hope this isn't a sign of hoarding....cause I will be in trouble. Well my precious "peeps" (where did that word come from anyway) I need to go take more pictures. I'll be back as soon as I can.
Thanks for stopping by.
Vintage Lady
Hello Everyone, I greet you today with an announcement and you don't want to miss this one. Jackson's Digital Expressions is having a challenge and your host is none other than myself, so of course I want to encourage you to participate. So kiddos don't wait any longer. Last week the Altered Art Team hosted the challenge and this week the Sketch Team is hosting the challenge. Team members were required to use a sketch and a duet of colors (two colors) for their project.
BTW..did I tell you the challenge is everyone's favorite...thats right my lovely crafters it's "Anything Goes" so you can do your thing and show it off. There are a few rules but not many so hop on over and enter your creation. I hope you do decide to play along with the sketch challenge this week at Jackson's Digital Expressions Challenge. The winner will receive (3) images from Jackson's Digital Expressions, (2) images from Guylou's Inimitability, and an invitation to be a Guest Designer. There will also be three Top Picks chosen.
ABOUT MY CARD: I created my card with the 20's and 30's era on my mind. I am in love with the women of that period. The way they dressed, flirted and carried themselves is something I admire and wonder what it would have been like to have lived during that time. My image "Miss Lady" can be found in Robert's store along with other amazing arts. Visit Fine Arts By Robert Jackson and browse his entire store to see the many talents of this man.
I colored Miss Lady with prismacolor pencils and copic markers. I chose lavendar shades because purple is the color of kings and lavendar must be the color for the princess and queen of the king. DP is DCWV and CS is Recollections. Added a couple of brads and a touch of glimmer to finish the card.
IF YOU'RE LOOKING FOR THE BINGO CHALLENGE SCROLL DOWN.
Hello my crafty buddies, its so nice of you to stop by and I do have a couple of cards to share with you. As I was going through my computer attempting to organize my
digi stamps by company I found several stamps that I had not used so I said to myself, "self, you need to use these stamps" and woola a card is born. This image is from Tickle Pink and the paper is from My Minds Eye (can't remember which collection) and the sentiment is a Hampton Arts stamp. I used Copics to color the little fella and then I noticed that he was either very angry or singing...I went for singing (smiles). I decided to use the leftover for the inside but I'm not sure if I kept the theme.
If you haven't participated in my Bingo Challenge, please scroll down and read about it and perhaps even take the challenge. Cool prizes to be won.
Hello my crafty buddies, its so nice of you to stop by and I do have a couple of cards to share with you. As I was going through my computer attempting to organize my
digi stamps by company I found several stamps that I had not used so I said to myself, "self, you need to use these stamps" and woola a card is born. This image is from Tickle Pink and the paper is from My Minds Eye (can't remember which collection) and the sentiment is a Hampton Arts stamp. I used Copics to color the little fella and then I noticed that he was either very angry or singing...I went for singing (smiles). I decided to use the leftover for the inside but I'm not sure if I kept the theme.
I would like to enter this card in the following challenges:
Crafty Creations - Male Birthday Card
Stamp With Sarah Kay - For A Boy
If you haven't participated in my Bingo Challenge, please scroll down and read about it and perhaps even take the challenge. Cool prizes to be won.
Another challenge you may want to check out is Jackson's Digital Expressions. There are weekly challenges and Anything Goes!!!! There's nothing to lose and a whole lot of cool things to be won. Just click the link above and hop right on over.
Wings On Cards
Before I get started let me remind everyone to visit Jackson's Digital Expressions and join the challenge. Its "anything goes" and the prizes are great! You've still got time for the Altered Arts Team and on May 22nd you will have another opportunity to win prizes when the Sketch Team host the challenge.
I've been on a tutorial search for new and interesting cards and I found one that was created by Marianne Skjelstad out of Norway. I am going to share with you without a lot of whoopla. Here is my card, which I am referring to as the "Winged Card" although Marianne referred to it as "The Magic Card." To see the original instructions and more of Marianne's gorgeous creations, which I draw my inspiration, visit this link http://mariannespapir.blogspot.com. I'll try to explain how it all works and then I will post the tutorial by the end of the week. I've taken several photos of it to try and give you a good idea of how it looks.
This is the front of the card. I didn't use very many embellishments because I wasn't sure how it would turn out. Yep once again against what I've been told by Joyce, I am posting a demo or trial version of a card. Anyway, notice the two side folds..they remind me of wings so that is how my card got its name. The center section is actually hiding the inside of the card which you can see in the next image.
Now after lifting the flap you can see the space for your personal message. So what happened to the flap you ask???? well its still there but you have to hold it up or lay the card down as I have done in the next photo.

Here you can see the card fully opened and tell me...don't the card appear to have wings and could take off in flight at any moment (smiles). On the top flap you could stamp a verse and leave the bottom for a personal message.
So what do you think about this card? It is really cute and once I post the tutorial I hope you will try it.
May's Bingo Challenge
(This post will not drop from my blog until it ends)
Hello and Welcome to a new Monthly Challenge here at Mema’s Crafts...perfect place for showcasing your talent, getting inspired by others, learning, winning prizes and just plain old fun. This month we have a great challenge for you. BINGO! That’s right, and all you need to do is include 3 items from the graphic that go either across (horizontal), up or down (vertical) or diagonal on your project. Its just that simple...sooooo
“LET’S PLAY BINGO”
Let’s
Play Bingo!
|
||
Buttons
|
Lace
|
Bling
|
Pink
|
Ribbon
|
Die
Cut
|
Blue
|
Flowers
|
Embossing
(Dry or Heat)
|
CHALLENGE
RULES
HOW TO PLAY:
Everyone can PLAY and anyone can WIN! Each month Mema draws at least one lucky
name for a prize ranging in value from $5-$25 in various forms. Here’s how you can win…- Create a new card
or paper-crafted project fitting the challenge (no old projects please)
- Include a link
back to this challenge in your blog post or gallery upload (remember to link to your post not your blog).
- Deadline to
enter is May 31st at 6:00 p.m. CDT.
- Follow
the standard entry rules located in the left sidebar
We
had 33 entries for ”Somebunny Loves You” Grab Bag Candy giveaway last month
and two entries were selected to receive a
Grab Bag Surprise. Our random
winners selected by none other than Mr. Linky itself is #28, Shirley (UK) and #2
Maxine (New Zeland). Both ladies met the requirements and we appreciate the comments
left by each. Please email Mema with
your postal address at lesia.cook@gmail.com to claim your prize!
(all prizes must be claimed by May 7th)
What
was in the bags you ask well, here is the list.
Grab Bag A:Magnolia Ink Magazine "Make A Wish"
Longing Tilda
Spare Parts Paper Flowers
Miniature Graduate Punch
Prima Flowers
Smash Book NoteCards
Grab Bag B:
Daisy Doodles Paper Flowers
Prima Flowers (Paper and Fabric)
Foot Long Clear Stamps
Smash Book Note Cards
Prima Long Stem Branch
Tim Holtz Filmstrip Die
Thanks to all the participants and I hope you will participate in this month’s challenge, where the prize will be a Saturated Canary e-gift certificate.
So while you're playing Bingo and I'm going to go and take a nap.
"find beauty in all things and then go create your own"
Labels: cards, challenges,
challenge,
mema's crafts,
monthly
Fan Cards and Tent Cards
This is starting to be a habit...finding tutorials and trying them out. You've seen my little gift box which wasn't so bad, but for my next test I had to contact the creator of this little fan card. Granted mine is amateurish (is that a word) to say the least so if you would like to see the master creator's version visit Inky Angel's blog for one of her fabulous fan designs. This is my first attempt but I promise you I will try again and hopefully will do better.
When I tell you that I had to bring out math books, reach out to family members I am not joking! Between radius, diameters, protractors and compasses, I wasn't sure I would get the concept...but now that I have, everyone should watch out.
This first snapshot is the card laying on its side (It's a bit darker than it really is). The Tim Holtz clip in the upper right corner doesn't belong (that reminded me of the kid's song that says "which of the items doesn't belong", and for some reason I found my words funny...go figure. Anyway as I was saying the clip is there because I made a small mistake that couldn't be corrected so I had to use the clip to keep the card closed. That's how we learn right? Well the next snapshot is the fan standing up.
This snapshot got lighter (but a more true color) and I'm not sure why, but here you can see the little pocket on the front that holds a tag where the sentiment can go. By the way before you put the pieces together you really must decorate...that was mistake number 2 for me. Yep this little project had lots of mistakes for me...but it sure was fun figuring out things. Glad I used regular paper and not my paper stash that I have yet to convince myself that it will be okay to cut. I know you ladies know what I am talking about....be honest. .
My final snapshot shows the fan open. Excuse the non-decorations but like I said lots of learning opportunities came with this project. Katie was kind enough to share her secrets with me just so I could get started. Be sure and visit her blog so you can see how lovely this fan can truly be. Here's the link to her Shabby Vintage Fan Card and the link to fan #2. She also created a tutorial along with another fan card which is stunning. Click here for the tutorial and yet another fan card.
The next card I want to share was fairly simple if you follow the instructions correctly. By the way I recommend that everyone have at least one cutter that has measurements in centimeters and inches. It comes in handy. The next card is another tutorial so I didn't do a lot of planning for it but it turned out okay. Here you go.
When I tell you that I had to bring out math books, reach out to family members I am not joking! Between radius, diameters, protractors and compasses, I wasn't sure I would get the concept...but now that I have, everyone should watch out.

This first snapshot is the card laying on its side (It's a bit darker than it really is). The Tim Holtz clip in the upper right corner doesn't belong (that reminded me of the kid's song that says "which of the items doesn't belong", and for some reason I found my words funny...go figure. Anyway as I was saying the clip is there because I made a small mistake that couldn't be corrected so I had to use the clip to keep the card closed. That's how we learn right? Well the next snapshot is the fan standing up.
This snapshot got lighter (but a more true color) and I'm not sure why, but here you can see the little pocket on the front that holds a tag where the sentiment can go. By the way before you put the pieces together you really must decorate...that was mistake number 2 for me. Yep this little project had lots of mistakes for me...but it sure was fun figuring out things. Glad I used regular paper and not my paper stash that I have yet to convince myself that it will be okay to cut. I know you ladies know what I am talking about....be honest. .
My final snapshot shows the fan open. Excuse the non-decorations but like I said lots of learning opportunities came with this project. Katie was kind enough to share her secrets with me just so I could get started. Be sure and visit her blog so you can see how lovely this fan can truly be. Here's the link to her Shabby Vintage Fan Card and the link to fan #2. She also created a tutorial along with another fan card which is stunning. Click here for the tutorial and yet another fan card.The next card I want to share was fairly simple if you follow the instructions correctly. By the way I recommend that everyone have at least one cutter that has measurements in centimeters and inches. It comes in handy. The next card is another tutorial so I didn't do a lot of planning for it but it turned out okay. Here you go.
It turned out really cute although my snapshot doesn't show it that well. I stamped and colored Tilda and then cut her out so she could dangle in the oval cutout. In hindsight the next one I make I will add a scenary behind the oval so it will add an illusion to the card, additionally decide a different way to dangle the image should I use one. This little card has great potential and has invoked a lot of ideas for me. I actually excited about creating my next one. The next snapshot is missing...forgot to take the snap. It was one from the side so you could see how I put the pieces together to form the tent. I'm adding the tutorial to my blog in case anyone wants to try their hand at it. You would put your personal message on the back of the card and by the way it folds flat to create a 6x6 card. I wasn't going to show the back because it is so unfinished.
Like I said on the back you would place your personal message and/or greeting. I was trying to show that but was in to much of a hurry and the camera captured my mistake....my sentiment is crooked...not a little...it appears to be the Leaning Tower of Pisa..(so sad). But it is what my BFF (Joyce) and I refer to as a demo card, but I broke the rule that states a demo will never be posted. She is going to talk about me and I can hear her now "what were you thinking" or "how do you plan to fix that." She's a funny gal but she is my BFF and she'll get over it, then proceed to figure it out and show me the error of my ways. After all in the end she'll love me anyway (at least I hope so).
And to all my followers I love you guys and hope you will continue to
"find beauty in all things, and then go create your own"
Little Gift Box
This week for some reason I have been finding tutorials and trying my hand at them. Rather than chat you up, I think for this post I will just let you see my creations and hopefully get inspired. So here we go.....
This is the box standing up on it's side.
The paper is from Die Cut With A View and the flowers are Prima. I used a Tim Holts fastener and a few brads to work as hinges. The pearls are Zva creation. I left an open space beneath the pearls in the corner to add my sentiment or greeting later.
This view allows you to see the hinged brads that work to allow the top to open and shut.
Not real sure why I took this photo but anyway it shows the box from an angle with it closed.
Here you can see the box opened and filled with the little Ande's mint candies.
Well that's all I have everybody. Hope this inspires you to challenge yourselves and try new things. This was a huge step outside my comfort zone but I enjoyed it.
And now I'm going back to YouTube University for another adventure...not Master Level but interesting enough to challenge me, and make throw a few things and maybe even stomp my feet.
I'm think I'm getting sleepy so until we chat again remember...."find beauty in all things and then go and create your own"
This is the box standing up on it's side.
The paper is from Die Cut With A View and the flowers are Prima. I used a Tim Holts fastener and a few brads to work as hinges. The pearls are Zva creation. I left an open space beneath the pearls in the corner to add my sentiment or greeting later.
This view allows you to see the hinged brads that work to allow the top to open and shut.
Not real sure why I took this photo but anyway it shows the box from an angle with it closed.
Here you can see the box opened and filled with the little Ande's mint candies.Well that's all I have everybody. Hope this inspires you to challenge yourselves and try new things. This was a huge step outside my comfort zone but I enjoyed it.
And now I'm going back to YouTube University for another adventure...not Master Level but interesting enough to challenge me, and make throw a few things and maybe even stomp my feet.
I'm think I'm getting sleepy so until we chat again remember...."find beauty in all things and then go and create your own"
Labels: cards, challenges,
boxes,
brads,
DCWV,
Handmade,
handmade cards,
prima,
treats,
tutorial,
wild orchid
Mother Day Wishes
I want to wish all my mommies out there a Happy Mother's Day! I was treated to breakfast/brunch by my grand-daughter and her mom. Actually it was more like brunch with all my breakfast favorites. Then after getting full and feeling quite lazy my boys decided it would be good to take me shopping and it was such fun. I didn't drain them and I did remind them to grab the coupons out of my bin and off we went to get more stuff for my crafting room...like I really need something else and where to put these things will be a challenge all by its self (laughing right about now). My cards were all gorgeous and I find the words carry such a different meaning for me now that I'm older (empty-nest syndrome..going on 35 yrs) (he he laughing again).
Most folks when they divorce they don't keep contact with their ex, but my ex and I are the best of friends. I can count on him to remember all the holidays and sometimes the just because kicks in. This year he got me once again a Coach purse (my favorite brand), and a pair of diamond stud earrings. Between the cards, the gifts and the attention I think I cried to hard for make-up so I looked a hot mess and then memories of my own Mom settled in and more tears came. I did eventually stop crying long enough to say farewell to the youngin's and the phone finally stopped ringing and I was able to just sit back and relax.
It must have been to much for my heart to take because today, is a different story. I didn't get out of bed until after lunch time and was totally starving but could tell that it would not be a good idea to eat what I had in my house but going outside with my allergies was a NO NO so instead I ordered Chinese food and had it delivered. So now that I've wolfed that down, and made this post I think I will say good-nite to all my lovely followers.
Thank you for taking time to stop by and visit and I hope to see you again real soon. Don't forget to .............."find beauty in all things and then go create your own."
BTW: If you haven't entered my Bingo challenge scroll down and join us!
Labels: cards, challenges,
Bo Bunny,
girly,
Handmade,
handmade cards,
holiday,
mother's,
prima,
tutorial,
wild orchid
Energy Burst
Hello My Crafting Family....yep I made it back and all I can say is my GOD is not just good but he is a master in all that he does! I am blessed through and through....and I can't get enough. I am back with more energy than ever before and I'm starting off by sharing a card with you that I created after the mad dash to get Mother's Day cards completed and now I can enter this card into challenges starting with the Outlawz Greeting Card Challenge of which I was a guest designer. The ladies over there are just plain awesome and talented to boot. They are on my like list.
This image is from Mo Manning and I actually purchased her with the intent of using her on an Easter card, but unfortunately things didn't quite go as planned. To many request for Mother's Day cards and I couldn't say no, so I put this little cutie on the back burner.
But finally I was able to get back to her and finish this card. I used prismacolor pencils with Gamsol and copic markers to color her. The DP is from My Minds Eye and the cardstock is Bazzill. I layered this card and garnished it with a bit of stitiching, eyelets, pearls and flowers from Wild Orchid.
Nowadays I can't seem to create a card without decorating the inside as well, and for this card that same desire held true. As you can see on the inside of the card I used the same DP and created a pocket to hold your personal message. The stamp was inked using Stazon Saddle Brown and the little violinist was courtesy of my grand-daughter.
I have more cards to share but I must first find a good place with proper lighting so I can take better pictures and get them posted for you. For those of you participating in my challenges I send a big thank you. Hope you enjoyed your visit and thanks for stopping by. Any comments you wish to make will be so appreciated.
Entering this card in:
Make It Monday (MIM)
Oldie But A Goodie
Outlawz Greeting Card Challenge
Note of Interest: The winner in New Zeland received her goodies!
This image is from Mo Manning and I actually purchased her with the intent of using her on an Easter card, but unfortunately things didn't quite go as planned. To many request for Mother's Day cards and I couldn't say no, so I put this little cutie on the back burner. But finally I was able to get back to her and finish this card. I used prismacolor pencils with Gamsol and copic markers to color her. The DP is from My Minds Eye and the cardstock is Bazzill. I layered this card and garnished it with a bit of stitiching, eyelets, pearls and flowers from Wild Orchid.
Nowadays I can't seem to create a card without decorating the inside as well, and for this card that same desire held true. As you can see on the inside of the card I used the same DP and created a pocket to hold your personal message. The stamp was inked using Stazon Saddle Brown and the little violinist was courtesy of my grand-daughter.
I have more cards to share but I must first find a good place with proper lighting so I can take better pictures and get them posted for you. For those of you participating in my challenges I send a big thank you. Hope you enjoyed your visit and thanks for stopping by. Any comments you wish to make will be so appreciated.
Entering this card in:
Make It Monday (MIM)
Oldie But A Goodie
Outlawz Greeting Card Challenge
Note of Interest: The winner in New Zeland received her goodies!
Subscribe to:
Posts (Atom)


